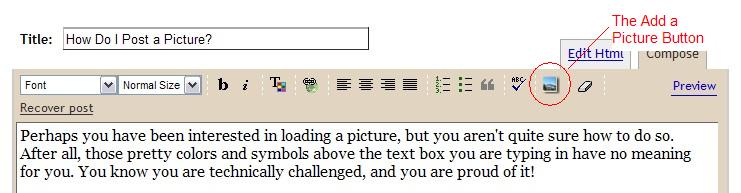
However, you don't want to seem ignorant and ask. What if the person scoffs at you and says, "Dude, it is so easy!" Well, that is why this guide is here! We will help you through your picture crisis!
The first step is to find the pretty blue square on the toolbar above the text box you type in. You can click the picture if you need a larger view. Hit the back button to return to this blog.
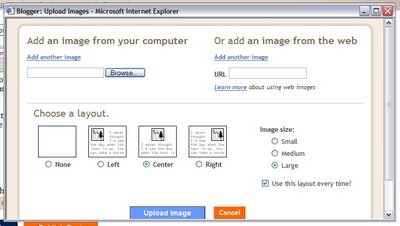
After you click the blue button, a box will pop up in a separate window.
 We are going to assume you know where to find your pictures on your computer. If you don't, you may have to call the neighbor kid and ask him to show you. The reason for this is that each computer is different.
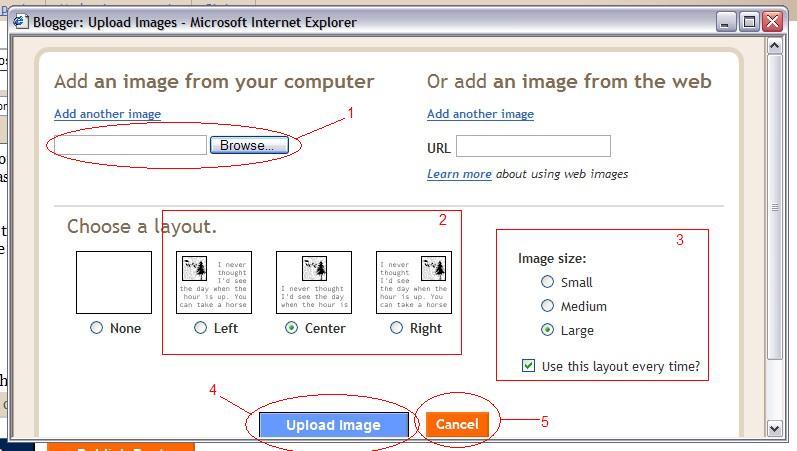
- The file bar and browse button: So, maybe you know exactly where your picture is. Well, you have the option of typing it in, of course. But most people choose to click the browse button. With the browse button, your My Documents folder will typically pop up. Find the folder you keep your pictures in. In many cases, this is the My Pictures folder. Choose the picture that you want to upload. Then go to Step 2.
- Chooose where you want your picture to be on the blog. If you are really technically challeged and want things to look pretty, I recommend center. However, you can also choose left or right for your picture, and then the text will apppear next to the photo. It is up to you.
- Choose how you want your picture to look. In most cases, people visiting your site will be able to click on the picture to enlarge it. I recommend medium or large though, because I don't want to have to pull out my glasses to see a picture either. If you like your pictures to always be Medium and Center, you can choose to put a check in the Use this layout every time box.
- Upload Image does just that. When you are done choosing your options, click Upload Image. A box will appear telling you that it is uploading the image from your computer. Sit back and take a sip of coffee. When Blogger is done, you will see a box with a blue DONE button. Click this button and your image will appear in blogger.
- The Cancel button is for anytime until the upload process. Maybe you realized Aunt Ida might not appreciate having a picture of Uncle Earl wearing lipstick posted all over the web. Hit Cancel and no one will be the wiser that you tried to upload that incriminating picture of Uncle Earl.

3 comments:
I love your new blog it will be very helpfull. keep up the god work
This is great! You should consider checking out http://blogpretty.com where we discuss these very sorts of things for the same reasons you've mentioned. It's a new forum and could really do well with input from people like yourself.
I'm glad to have found you. Will try to follow your instructions.
Post a Comment